Using a moisture analyzer is not that complex but still care and professionalism have to basic consideration before subjecting yourself to use. Commencing use, the first step is to open the moisture analyzer packaging and get to confirm if every bit of the entire gadget is in place. Basic elements of the complete moisture analyzer will be inclusive of:
- Conformity declaration
- Listed predefined methods
- A brochure as a guide to moisture analyzer applications
- Instructions for operations
- The power code
- Draft shield
- A sample specimen
- Pan handler for the sample
- Support for the pan handler
- Sample pans (made of aluminum)
For the purposes of safety, you ought to check the entire device for any traces of damage that may have occurred during factory packaging or over the transportation process.
In order to get best results and as well get the moisture analyzer to serve its purposes, the conditions required for its correct and timely manner have to be adhered to. Temperature is very important when it comes to functions of the moisture analyzer. You ought not to place the gadget under very hot conditions as also in rooms or regions that have intense fluctuating temperatures. Direct sunlight should as well be avoided.

The moisture analyzer being an instrument based on precision, dependability and accuracy will only be guaranteed if an optimum location is chosen. The placement of the analyzer ought to be on a surface that is particularly flat and very firm. Such a surface should as well be free of any kinds of vibrations, as this can interfere greatly with test results and readings.
Dust can be a major hindrance to test results and overall functions of your moisture analyzer, cleanliness and especially dust free environments need to be chosen to emit any kind of mishaps that can be caused by the same. Since heat affects performance and readings of the moisture analyzer, the gadget has to be placed in a well ventilated area to disallow buildup of heat. Such will not only maintain correct readings but as well prevent malfunction of the analyzer and boost its lifespan.
The instrument will as well have the capability to produce its own heat due to its nature of work. For this reason, you should be careful when it comes to items placed near the instrument since there are materials that are as well very sensitive to heat.
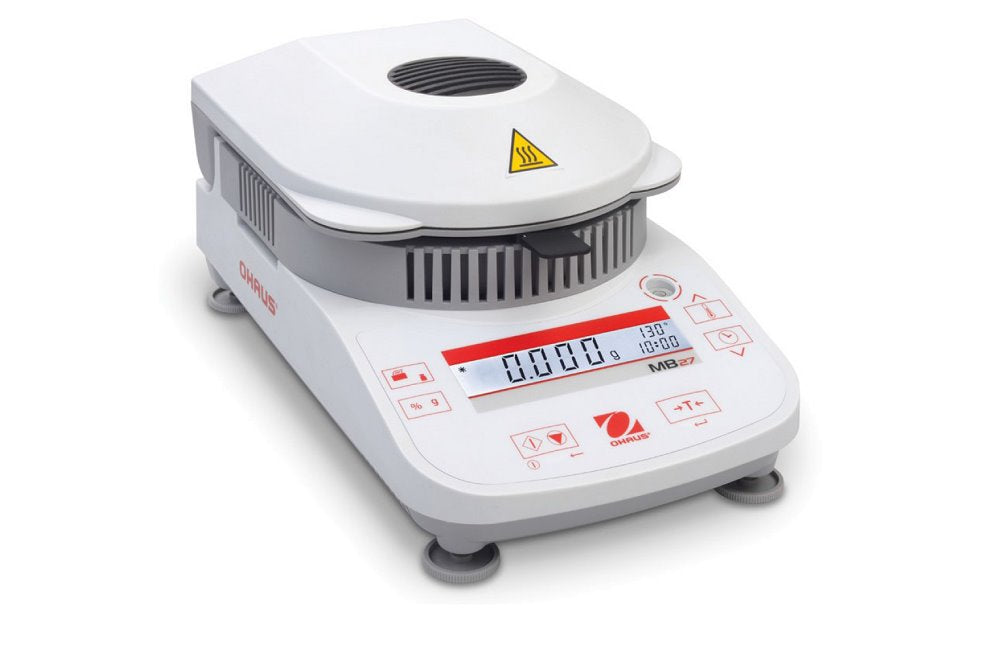
Once all conditions are met and the sampling processes are commencing, the first aspect to check on is the leveling of the moisture analyzer. Since it is very challenging to know whether surface is perfectly level, especially with eyesight, the moisture analyzer comes with inbuilt leveling gauges. There is an air bubble in tube that is set to indicate whether the device is leveled or not. So as to ascertain the perfect required level, there two adjustment screws that can be turned until the bubble is at the center of the tube. When the bubble is well positioned at the center, it means the moisture analyzer is leveled as required for sampling. This ought to be repeated every time the instrument is moved to a different position.
Once leveling of the instrument is confirmed, you can then go ahead to connect it to the power supply. There are instances whereby you might find that the power cord is not long enough, under such circumstances you will find warnings that strictly advice you not to use any other kind of extension cable other than the three pin extension that is fitted with grounding conductor.
When power connection has been properly done, you will then switch on the moisture analyzer and let it heat up on its own for a period of one hour. During this sixty minute duration, the instrument is set to progressively adapt to conditions that are ambient for its proper functions.
There are specific line voltages depending on the manufactures and the country the instrument is destined to go. The two are 230 VAC and 110 VAC, if you are not sure about the particular requirement; you ought to check the labeling and instruction manual. Wrong connections will either result to elongated processes or on the other hand lead to fuses blowing up.
After confirming the correct power requirements, you can then place the shield into the sample chamber. Draft shield is then placed followed by the support for the sample pan, both of which can only be fitted into a given particular position.
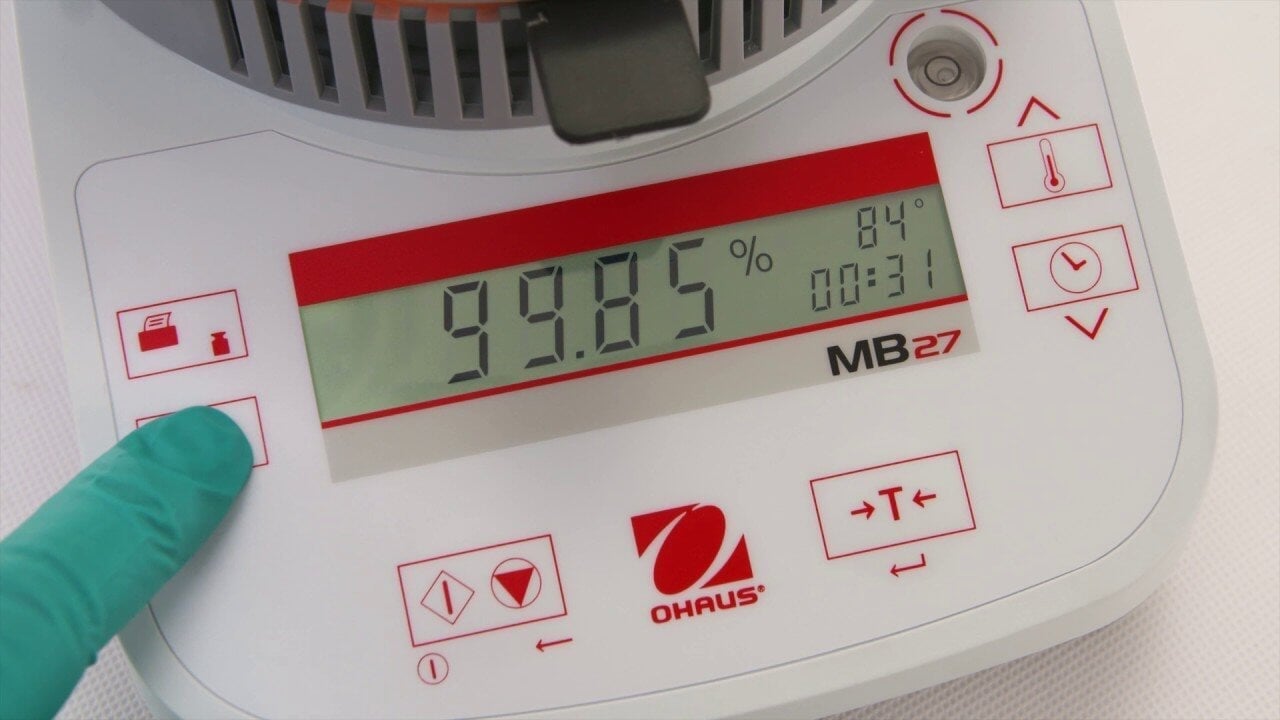
The operation part is not tricky or challenging since the instrument automatically guides you through the entire process without you having to operate a single button. You should be keen during and after the entire process as you are guided by the Moisture Analyzer. Always remember to use the sample pan handler so as to avoid any risk of burns.