Key Takeaways
-
Analytical balances with 0.1 mg (0.0001 g) readability are extremely sensitive and easily affected by temperature, vibration, air drafts, static electricity, and user technique—even small environmental changes can introduce milligram-level errors.
-
The majority of accuracy loss in routine lab work comes from seven avoidable mistakes: poor installation, skipping warm-up, infrequent calibration, contaminated equipment, poor technique, environmental neglect, and ignoring measurement drift.
-
Even a few milligrams of error can invalidate pharmaceutical, chemical, and QC results, especially under 2024 regulatory environments such as FDA, EMA, and ISO/IEC 17025.
Introduction: Why Tiny Mistakes Matter on a 0.0001 g Balance
A 0.1 mg analytical balance can swing from perfectly accurate to completely useless in the span of a single weighing session. All it takes is a draft from an open door, a sample straight from the oven, or a quick calibration with dusty weights. These sensitive balances are designed to detect changes smaller than a grain of salt—but that sensitivity cuts both ways. Every minor disturbance in the lab environment, every shortcut in technique, registers on that fourth decimal place. Laboratories performing regulated testing typically rely on analytical balances for laboratory weighing
Understanding the difference between readability and accuracy is crucial for anyone working with analytical balances. Readability refers to the smallest increment the display can resolve. Accuracy describes how close your measured value is to the true mass, encompassing bias, drift, linearity, and repeatability. A balance may display 0.0001 g increments, but achieving that level of accuracy in practice requires careful handling of environmental factors, proper training, and consistent technique.
Consider the stakes in typical 2024–2025 lab scenarios: weighing active pharmaceutical ingredients for GMP batches, preparing calibration standards for trace analysis, or conducting microdosing studies where a 0.5–1 mg error is unacceptable. In these contexts, systematic errors don’t just affect data quality—they trigger audit failures, batch rejections, and regulatory consequences. The rest of this article walks through seven specific, concrete mistakes that routinely reduce accuracy, with practical tips to fix each one.
Mistake 1: Installing the Balance on an Unstable or Poorly Controlled Surface
Many accuracy problems start before anyone even touches the weighing pan. The physical placement of your balance in the lab matters enormously, and getting it wrong undermines everything else you do.
Common bad setups include benchtops shared with centrifuges or shakers, light laminate tables that flex when someone leans on them, and spots near doors, windows, or HVAC vents. These locations introduce vibrations and air currents that cause drifting digits and poor repeatability. Even if you do everything else correctly—perfect calibration, flawless technique—the balance cannot overcome the mechanical interference from its surroundings.
Vibrations from nearby fume hoods, compressors, or even hallway foot traffic create oscillations in the inertial mass on the pan. Studies have shown that proper setups using laboratory anti vibration tables for balances can reduce measurement variability by up to 70% compared to standard benchtops. That’s the difference between data you can trust and readings that fluctuate unpredictably.
The ideal installation involves a heavy, rigid stone or concrete-topped bench, or a dedicated anti vibration table located away from high-traffic walkways. Keep the balance away from direct sunlight, windows, doors, and HVAC vents. The recommended ambient temperature range is typically 20–25°C, with humidity around 40–60% as a baseline for stable operation.
Leveling is equally crucial. Every analytical balance includes a built-in bubble level for a reason. Uneven leveling causes non-uniform load on the internal mechanisms, shifting zeros and introducing non-linearity. Use the leveling feet to center the bubble, and recheck after moving the balance or after any bench maintenance. A balance that isn’t perfectly level will never produce accurate readings, no matter how carefully you calibrate it.

Mistake 2: Skipping Warm-Up and Equilibration Time
Modern analytical balances may look like simple plug-and-play lab equipment, but they still need time to thermally stabilize before they can deliver accurate results. This is especially true after the balance has been moved, powered off, or exposed to sudden temperature changes.
Manufacturer guidelines vary, but most recommend at least one hour of warm-up after relocation within the same room. For balances that have been powered off for extended periods or transported between rooms with different ambient temperature conditions, warm-up times of 8–12 hours—often overnight—are common. Some microbalances require even longer.
The reason relates to the internal mechanisms of the balance. Components like the load cell, electromagnetic force restoration systems, and internal reference masses all expand and contract with temperature. If these components haven’t reached thermal equilibrium, you’ll see zero drift and non-linear response that looks like calibration problems but is actually just thermal instability.
A practical warm-up checklist looks like this: power the balance on at the start of the day, close the draft shield doors, place no load on the pan, and avoid any weighing during the warm-up period. If your balance has built-in self-diagnostic routines, run them after warm-up completes and before any critical weighing.
Sample equilibration matters just as much. Cold or hot samples from ovens, fridges, freezers, or fume hoods should sit in the lab for 15–30 minutes in closed containers before weighing. A warm porcelain crucible weighed immediately after removal from an oven can show errors of 10–15 mg due to convection currents and buoyancy effects inside the draft shield. Many labs mistakenly attribute poor results to “bad calibration” when the real culprit is insufficient equilibration time.
Mistake 3: Infrequent or Improper Calibration and Adjustment
Relying on factory calibration for months is one of the fastest ways to lose traceable accuracy. Under ISO/IEC 17025 or GLP conditions, this approach simply doesn’t meet regulatory requirements—and even in less regulated environments, it leads to systematic errors that compound over time.
There’s an important distinction between internal calibration (using built-in reference masses and automatic routines) and external calibration (using certified Class E2 or F1 test weights with known uncertainty and certificates). External verification requires certified test weights used with analytical balance calibration weights. Both serve different purposes, and both are necessary for maintaining your analytical balance calibrated to traceable standards.
For frequency, consider these guidelines: run internal calibration daily or before critical weighing sequences such as assay preparations or stability studies. Perform external calibration with certified weights monthly or quarterly, depending on your QA policy and the criticality of your measurements. At minimum, schedule professional calibration annually to satisfy audit requirements and maintain traceability.
Common calibration mistakes include using calibration weights that are dirty or corroded, touching weights with bare hands (oils and moisture from fingers introduce bias), using unknown “lab weights” with no certificates, skipping the zero step before starting the procedure, and calibrating while the balance is still warming up or exposed to air drafts.
A good practice flow for calibration looks like this: allow full warm-up time, clean the weighing pan, close all draft shield doors, verify zero, run the internal adjustment routine, then verify with an external certified weight close to your typical sample mass. If you normally weigh samples around 100 g, use a 100 g test weight for verification rather than only checking at low or maximum capacity.

Documentation is non-negotiable in many labs. Log every calibration event with the date, operator name, weight IDs, and results. This satisfies auditors and enables trend analysis to catch drift before it becomes a problem. One pharmaceutical lab famously failed an audit because calibration records were missing—invalidating months of test results and shutting down production.
Mistake 4: Neglecting Cleaning and Allowing Contamination to Build Up
Residues of powders, liquids, and dust on the pan and inside the draft shield can easily introduce milligram-level errors. Beyond accuracy, contamination also creates cross-contamination risks that can affect sensitive assays and generate false positives or impurity readings.
Common contamination sources include spilled microcrystalline powders, hygroscopic salts that absorb moisture from the air, sticky APIs, buffer droplets, fingerprints from bare hands, and glove powder. Even small amounts of residue under or around the pan cause friction, asymmetrical loading, and drifting zeros that look like random errors but are actually contamination effects.
A practical cleaning routine involves daily and weekly components. Daily, gently brush off dry residues with a soft anti-static brush and inspect surfaces for sticky or smeared materials. Weekly (or as needed), remove the pan and sub-pan according to manufacturer guidelines and wipe all accessible surfaces inside the draft shield with a lint-free cloth and mild, non-aggressive solvent compatible with your lab chemicals.
Safety precautions matter during cleaning. Power the balance off or put it into standby before deeper cleaning. Never spray solvent directly on the balance, as liquid can reach internal electronics. Avoid harsh agents like strong acids or bleach that can attack metal surfaces and seals.
To illustrate the impact: one micro-dosing experiment discovered a sodium chloride crust around the pan was causing a consistent +2 mg bias. This error would have been catastrophic for dosing calculations if not caught. Regular maintenance and regular calibration checks work together to prevent such problems from going undetected.
Mistake 5: Poor Weighing Technique and Sample Handling
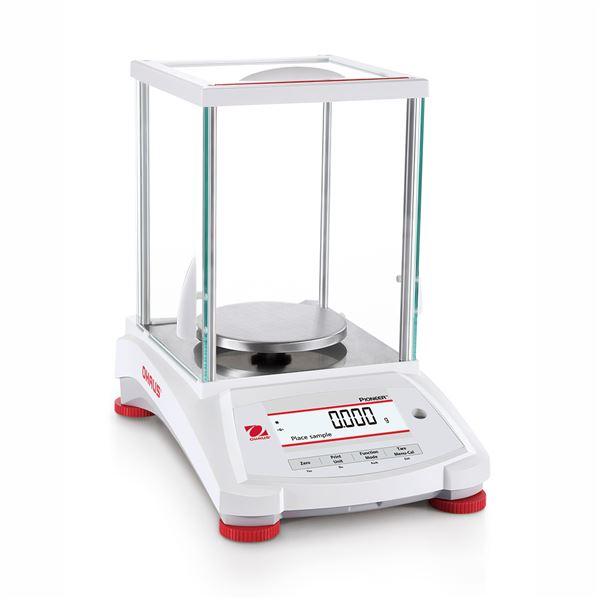
Even a perfectly installed, calibrated balance will produce bad data if the operator’s technique is sloppy. Modern laboratories frequently rely on high-quality instruments such as the sartorius bca124i entris ii analytical balance or the widely used
ohaus px224 pioneer analytical balance. Human error accounts for a significant portion of weighing errors, and proper training is essential for anyone using sensitive balances.
Key user mistakes include not using the tare function correctly, opening draft shield doors while reading the display, breathing directly onto the pan, rushing to record readings before the stability indicator appears, and repeatedly touching containers with bare hands. Each of these introduces errors that may seem small individually but accumulate quickly.
Correct use of tare follows a specific sequence: place the empty container on the pan, close all doors, wait for the stability indicator, press tare, then add the sample. This eliminates the need for manual subtraction and reduces transcription errors. The tare function is one of the most powerful tools for accurate measurements, but only when used properly.
Thermal and moisture effects cause problems that many operators don’t anticipate. Weighing hot glassware, freshly dried filters, or cold flasks without equilibration introduces buoyancy changes and convection currents inside the draft shield. Temperature differences on weighing samples can cause errors of 10–15 mg—far exceeding the balance’s readability.

The right tools make a significant difference. Use tweezers, spatulas, or tongs for handling weights and small samples. Wear nitrile or latex gloves to prevent fingerprints and oils. Use appropriate weighing boats, glass vials, or metal pans instead of staticky plastic containers when possible. Careful handling of samples prevents sample loss and ensures accurate results.
The ideal weighing sequence in prose form: open the door, place the container centered on the pan, close the door, wait for the stability indicator, press tare, add the sample gently using appropriate tools, close the door again if opened, wait for a stable reading, record the mass, then remove the container. Rushing any step in this sequence introduces unnecessary error.
Mistake 6: Ignoring Environmental Influences (Drafts, Static, Temperature, Humidity)
Analytical balances are extremely sensitive to the immediate micro-environment inside and around the draft shield. Most analytical balances can detect disturbances that humans can barely perceive, making environmental control critical for weight measurement accuracy.
Drafts represent one of the most common sources of incorrect readings. Open doors, people walking quickly past, fume hood airflow, and even the operator’s hand movements create air currents that cause unstable readings. The solution is straightforward: always close all draft shield doors before taking the final reading. Many operators get into the habit of reading the display with doors open, which defeats the purpose of having a draft shield entirely. Laboratories performing advanced measurements often upgrade to modern instruments like the radwag as 220 r2 analytical balance. Static electricity causes problems that are harder to recognize. Low humidity (often below 40% in air-conditioned labs), plastic weighing vessels, and synthetic lab coats can generate electrostatic charges that make materials cling to surfaces and cause readings to jump or drift unpredictably. In severe cases, a static charge on a plastic container can cause milligram-level fluctuations that never stabilize.
Concrete anti-static measures include maintaining room humidity around 40–50%, preferring glass or metal containers over plastic when possible, grounding the balance table, using anti-static brushes or ionizers near the pan, and avoiding vigorously rubbing plastics before weighing. Non magnetic tweezers and tools also help minimize electromagnetic interference with sensitive internal components.
Temperature fluctuations and humidity extremes create additional challenges. Avoid placing balances near radiators, in direct sunlight from windows (particularly during summer months), or directly under HVAC vents. Seasonal changes—winter heating versus summer cooling—can significantly alter balance behavior if not monitored. Sudden temperature changes are particularly problematic because they create thermal gradients that take time to equilibrate.
A simple monitoring practice helps troubleshoot unexplained drift: place a small digital thermometer/hygrometer near the balance and log environmental conditions alongside critical weighing series. When problems occur, you can correlate them with environmental deviations rather than assuming the balance itself is faulty.
Mistake 7: Overlooking Signs of Measurement Drift and Not Performing Routine Checks
Measurement drift is a gradual change in displayed weight over minutes to days without any real change in the sample mass. It’s insidious because it develops slowly, often going unnoticed until an audit reveals out-of-specification results or a batch fails quality testing.
Typical symptoms include zero values that slowly wander even with nothing on the pan, a known test weight reading slightly higher or lower each week, or repeats of the same sample giving increasingly inconsistent values over a single session. These signs indicate that something has changed—either in the balance itself or in the lab environment.
Simple performance checks can catch drift before it causes problems. Run a daily zero check: remove all load and verify the display returns to 0.0000 g consistently. Use a small reference weight (such as a 10 g or 20 g test weight kept near the balance) and weigh it multiple times to assess repeatability. Calculate the standard deviation of these repeat measurements. For more thorough verification, use test weights spanning low, mid, and high regions of the balance’s capacity to check linearity.
Common causes of drift tie back to earlier sections: insufficient warm-up time, temperature cycling from HVAC systems that turn off overnight, static accumulation on plastic containers, or internal mechanical wear from previous incidents of overloading the balance. Identifying the root cause helps prevent recurrence.
Set pre-defined tolerances for your checks—for example, ±0.2 mg for a 10 g test weight. If checks exceed this tolerance, stop critical work, document the issue, and arrange for service rather than working around the problem. In 2024–2025, many balances include built-in diagnostics, GLP printouts, and audit trails. Review error codes and maintenance reminders instead of dismissing them. Proactive monitoring and early detection prevent the catastrophic scenario of discovering that weeks of data are invalid.

Conclusion: Turning Seven Mistakes into a Daily Accuracy Checklist
The seven mistakes covered here—poor installation, skipped warm-up, inadequate calibration, dirty equipment, poor technique, environmental neglect, and ignored drift—collectively erode analytical balance accuracy in ways that compound over time. Each mistake may seem minor in isolation, but together they can render even the most sophisticated new equipment unreliable.
The practical response is to convert these points into a short, one-page SOP or daily checklist posted near every balance in your lab. This standardizes good practice across all users, from experienced analysts to new staff still completing proper training. Small investments in environment, training, and routine checks produce large returns in data reliability, regulatory compliance, and reduced rework. Selecting the correct equipment from professional precision laboratory balances and scales
For lab managers and QA leads, the action item is clear: review your current balance procedures against these seven points within the next month. Identify gaps, update SOPs, and verify that your lab environment supports accurate weighing rather than undermining it. The cost of prevention is always lower than the cost of invalidated data and failed audits.
Frequently Asked Questions
How often should I calibrate an analytical balance in a routine lab?
Daily internal adjustment—or at least before critical weighing sequences—is recommended in most regulated and quality-focused labs. This ensures the balance compensates for any overnight drift or environmental changes. External calibration with certified weights is typically performed monthly or quarterly, but the exact frequency should follow your lab’s quality system (such as ISO/IEC 17025 or GMP requirements) and the manufacturer guidelines specific to your balance model. Document every calibration event in a log or electronic system, noting the date, operator, weight ID, and results. This documentation satisfies auditors and allows you to track trends that might indicate developing problems.
How long should I let my analytical balance warm up after moving or powering it on?
Allow at least one hour after minor relocation within the same room, and 8–12 hours (often overnight) after extended power-off, transport between rooms, or major temperature changes. Many labs leave balances powered on continuously, using only display sleep modes, to maintain thermal stability and minimize warm-up time each morning. Always consult your specific manufacturer’s manual, as some models specify minimum warm-up durations in their documentation. Skipping warm-up is a common cause of inconsistent readings that operators often misattribute to calibration problems.
What is the ideal environment for an analytical balance?
The recommended temperature range is roughly 20–25°C with minimal short-term fluctuations—no more than 1–2°C change over a working session. Maintain relative humidity around 40–60% to limit static buildup while avoiding condensation or corrosion issues. The balance should sit on a rigid, vibration-damping surface away from direct sunlight, vents, doors, high-traffic corridors, and strong magnetic or electromagnetic fields. Environmental conditions are often overlooked as a source of errors, but they directly affect the max capacity for stable readings.
How can I tell if my balance readings are unstable or drifting?
Look for numbers that never settle, slow creeping of the displayed mass up or down, inconsistent results when weighing samples multiple times, or zero values that don’t return to 0.0000 g after removing the load. Run a quick test using a known reference weight: weigh it several times and check whether the values fall within your defined tolerance and show good repeatability. Before concluding the instrument is faulty, check environmental factors (air drafts, static charge, temperature changes) and recent events (moving the balance, cleaning, power outages). Often the cause is environmental rather than mechanical.
What containers and tools are best for accurate weighing on an analytical balance?
Use clean, dry, room-temperature glass vials, metal pans, or low-static weighing boats rather than lightweight, highly staticky plastic containers for microgram-level work. Handle weights and small samples with stainless-steel tweezers, forceps, or spatulas, and wear clean gloves to prevent oil and moisture transfer. The container should be appropriately sized—large enough for safe handling but not so large or tall that it disrupts airflow inside the draft shield or touches its walls. Using the right tools and containers is a simple change that dramatically reduces common errors in daily lab work.